Create a new Safe
After connecting your wallet, You will be able to create a new Safe with your other co-owners.
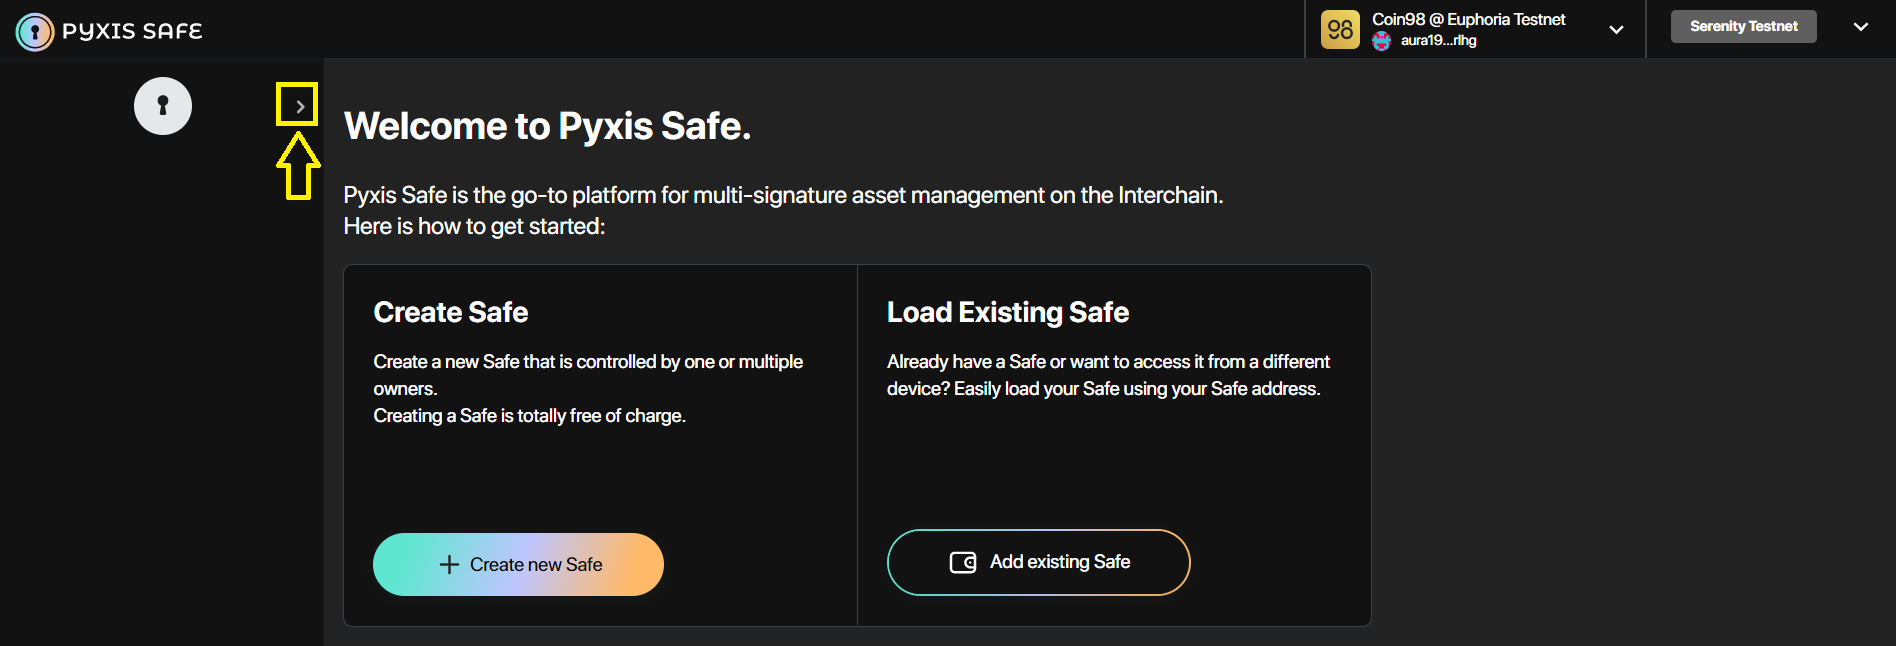
Safe list
To access your safe list, click on the arrow button on the left side of the UI. A sidebar will appear, showing all of your current and previously and in-progress created Safes. This will be explained further in specific features later on. You can manage multiple Safes that you own at a time. Every Safe must be added locally in order to be managed. The green tick marks the safe which is being managed at the moment.

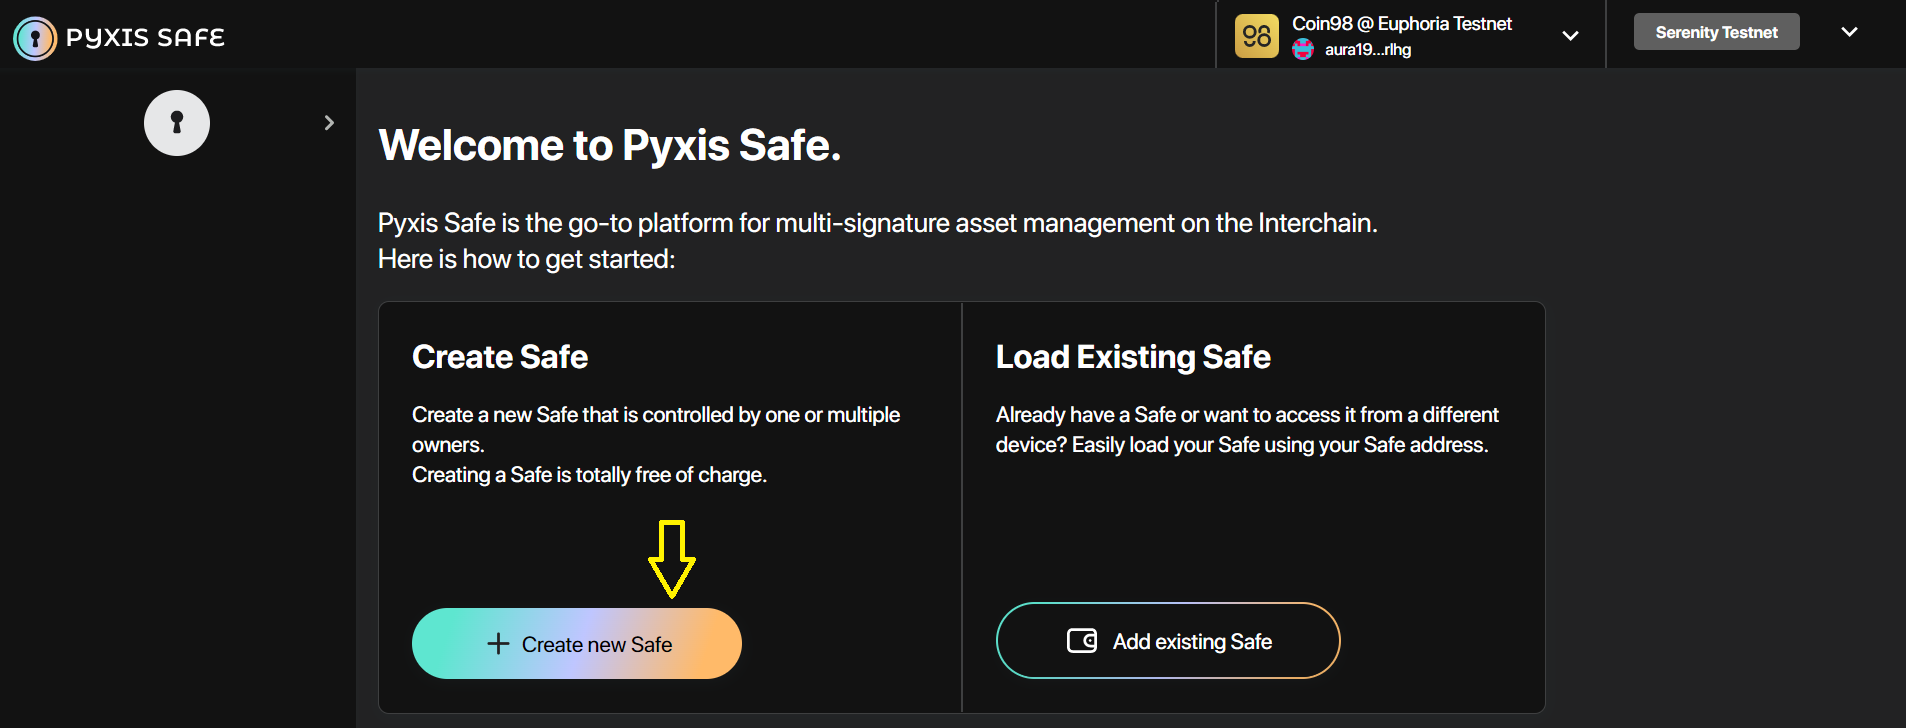
Create a new Safe
To start creating a new Safe, click on “+ Create new Safe”.
You will be guided through the process of creating a new safe, which consists of 4 steps:
Step 1: Connect wallet and select network
This is to confirm your previous network selection. You can switch to another network at this step if needed by clicking on “Switch Network” or doing the previous Network Selection process again. When you are good to proceed, click “Continue”.
Step 2: Name your safe
Be aware that this name is only stored locally on your browser’s cache. You will have to name it again when you add the safe on other browsers/devices. Click “Continue” to proceed to the next step.
Step 3: Owners and Confirmation
- Owners: You are required to declare every other owner of the Safe, apart from yourself (which has been included by default). By clicking “+ Add another owner”, you will be able to declare an owner’s name (locally stored, again) and wallet address. You can remove the unwanted owner(s) by clicking the trash bin icon next to that owner. An owner’s wallet address can also be obtained by scanning a QR code.
- Confirmation: You are required to define how many confirmations from all the co-owners that a transaction is needed to acquire before it can be executed. You can select the number from the drop-down list and the value will range from 1 to the maximum amount of declared owner. When you are good to proceed, click “Continue”.
Step 4: Review
In this step, you will have the chance to review all the declared information of the Safe that you are about to create. Click “Back” if you need to go back to change any of them. Otherwise, click “Create” to create the Safe. A confirmation screen will show up which indicates that your safe creation request has been created. All the other co-owneSrs have to allow the safe creation in order to activate the safe and put it in to use. You can either click “Continue” or close the pop-up. The newly created Safe request will be shown in the “Pending Safes” section.
Allow Safe creation
The safe must be allowed by all other co-owners before it can be put into use. In the safe list of a co-owner, the safes that need confirmation will look like below. Clicking “Allow” will start the process of adding the Safe into the Safe list of that owner. The co-owner has to define the name of the Safe, as well as the Name of other co-owners of the safe to proceed. The process is basically the same as creating a new safe, but without any owner or confirmation declaration. A pop-up will be shown indicating that you have finished the process. After that, the safe is marked as “Allowed”.
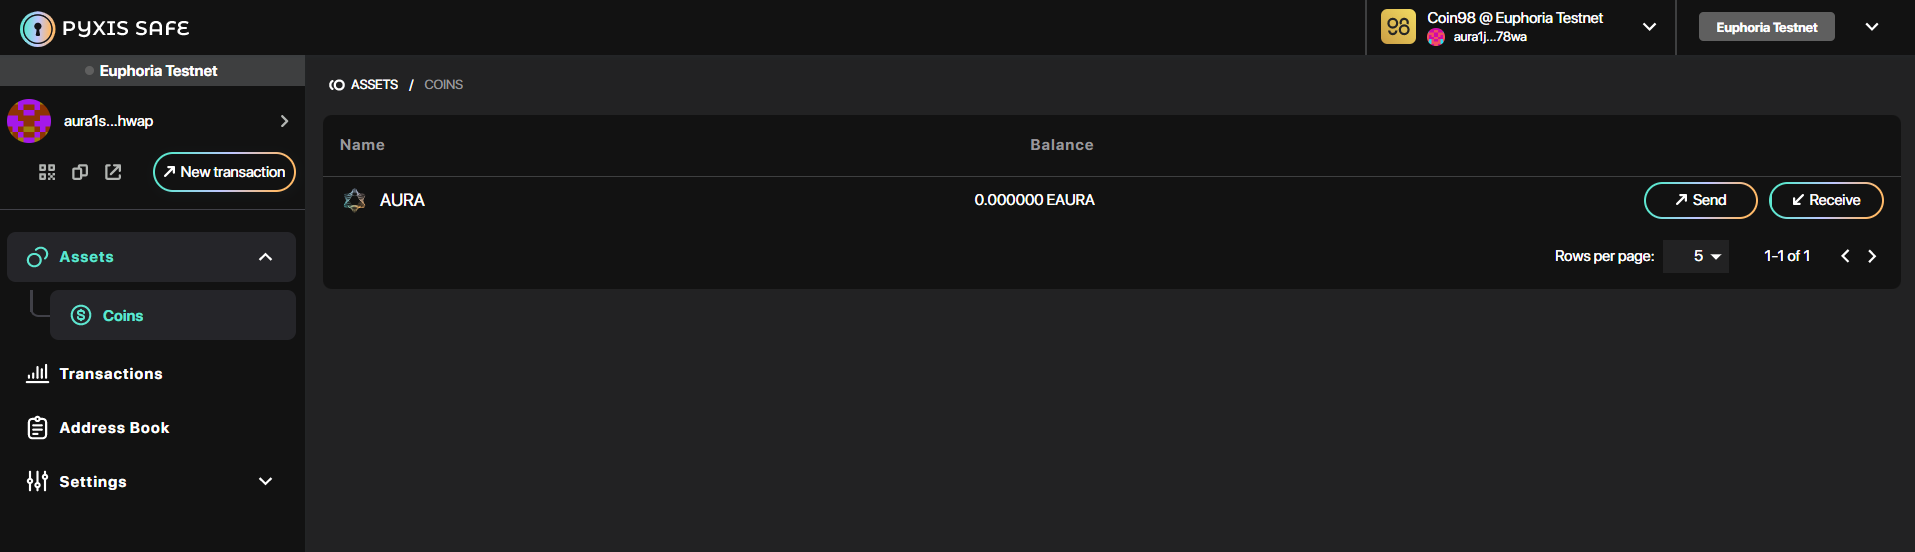
After all co-owners have gone through the process of Safe allowance, the Safe will not be marked as “pending” anymore, but instead active and can be managed.