Deploy a Contract
In order to deploy a contract on AURA network, make sure that you have properly set up your development environment, created and setup your Aura wallet, and have some test AURA or EAURA.
 In this section
We will show you how to build and deploy a contract from the example in the previous section, the Flower Store contract.
Aura CLI Config
In this section we will be working on aura_6321-3 staging testnet, but you may choose to use any network. Of course we recommend you use testnets only.
First let's make sure you have properly setup your aurad CLI. You can verify by running aurad config and it should look something like this if you're also using aura_6321-3:
$ aurad config
{
    "chain-id": "aura_6321-3",
    "keyring-backend": "test",
    "output": "text",
    "node": "https://rpc.euphoria.aura.network:443",
    "broadcast-mode": "sync"
}
In case it doesn't, you can either export it straight from the shell or by going to the directory and manually changing the values depending on the chain you'll be using, which should be located in ~/.aura/config/client.toml. You can find the reference configuration for all chains here.
The block explorers are available for all Aura networks. You can explore transactions, addresses, tokens of any kind, contracts, validators, etc.
- Mainnet: https://aurascan.io
- Euphoria: https://euphoria.aurascan.io
- Serenity: https://serenity.aurascan.io
And if you need the full reference, check out the networks info.
Once that is all done and you have your wallet ready with some test coins (AURA or EAURA), you can continue.
Build
First let's clone the repo:
git clone https://github.com/aura-nw/flower-store-contract
To build the contract which just builds to confirm everything is correct, you can run:
cargo build
For this example the contract should build without any issues, but in other instances you may need some help debugging errors and warnings. Normally the Rust compiler does a great job on pointing out what's wrong, but another alternative which includes a linter is using:
cargo clippy -- -D warnings
Now let's compile the code. There are a few approaches you can take on this, and you should choose the one that meets your needs accordingly. On this example we wil use the Optimized compilation.
- Basic compilation:
cargo wasm
- Optimized compilation:
RUSTFLAGS='-C link-arg=-s' cargo wasm
- Reproducible and optimized compilation:
docker run --rm -v "$(pwd)":/code \
  --mount type=volume,source="$(basename "$(pwd)")_cache",target=/code/target \
  --mount type=volume,source=registry_cache,target=/usr/local/cargo/registry \
  cosmwasm/rust-optimizer:0.13
Another recommendation is to write and use tests properly to ensure everything works as expected. In the flower example we included a set of tests for the contract, you can run it with cargo test which should return this, showing that in fact, all tests have passed.
cargo test

...

running 5 tests
test contract::tests::not_works_with_query ... ok
test contract::tests::not_works_with_add_new_id_existed ... ok
test contract::tests::not_works_with_sell ... ok
test contract::tests::initialization ... ok
test contract::tests::works_with_add_new_and_sell ... ok

test result: ok. 5 passed; 0 failed; 0 ignored; 0 measured; 0 filtered out; finished in 0.00s
Once that is done, we can move on and deploy our contract.
Deploy
We can compile the wasm contract with the stable toolchain before deploying it like so:
rustup default stable
RUSTFLAGS='-C link-arg=-s' cargo wasm
Now, let's go ahead and deploy the contract. When we want to deploy a contract to Aura Network, we must do so in two steps:
1. Store the code
We execute a store transaction type with the compiled code of the contract, and this stores it in the blockchain with a specific CODE ID.
# store contract
RES=$(aurad tx wasm store  ./target/wasm32-unknown-unknown/release/flower_store.wasm --from wallet --output json --fees 25000ueaura --gas 2000000)
# get the code id
CODE_ID=$(echo $RES | jq -r '.logs[0].events[-1].attributes[0].value')
In case the CLI store doesn't return the full tx_result, but only returns results with txhash, we will have to get the code_id by querying from RPC:
# get the code id
CODE_ID=$(curl "https://rpc.euphoria.aura.network/tx?hash=0x{TX_HASH}"| jq -r ".result.tx_result.log"|jq -r ".[0].events[-1].attributes[0].value")
Or you can also check the transaction on Aurascan where the Code Id will be displayed as well. You can get the transaction hash by running $RES, and it should look like this on Aurascan.
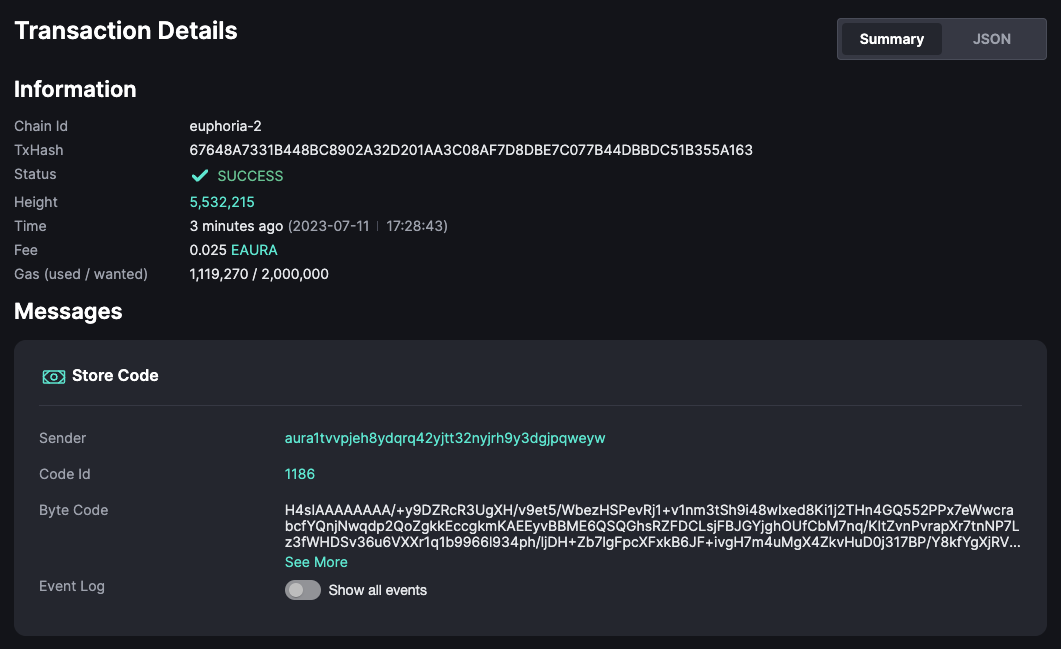
In this case, the CODE ID is 1186, we will use it in the next step.
2. Instantiate a contract with the stored code
In this step, we will execute an instantiate transaction in which we will specify the initialization arguments the contract takes and the CODE ID of the stored contract from the previous step.
# set initialization arguments
INIT='{"name":"init-flower","amount":1,"price":1}'
# instantiate contract
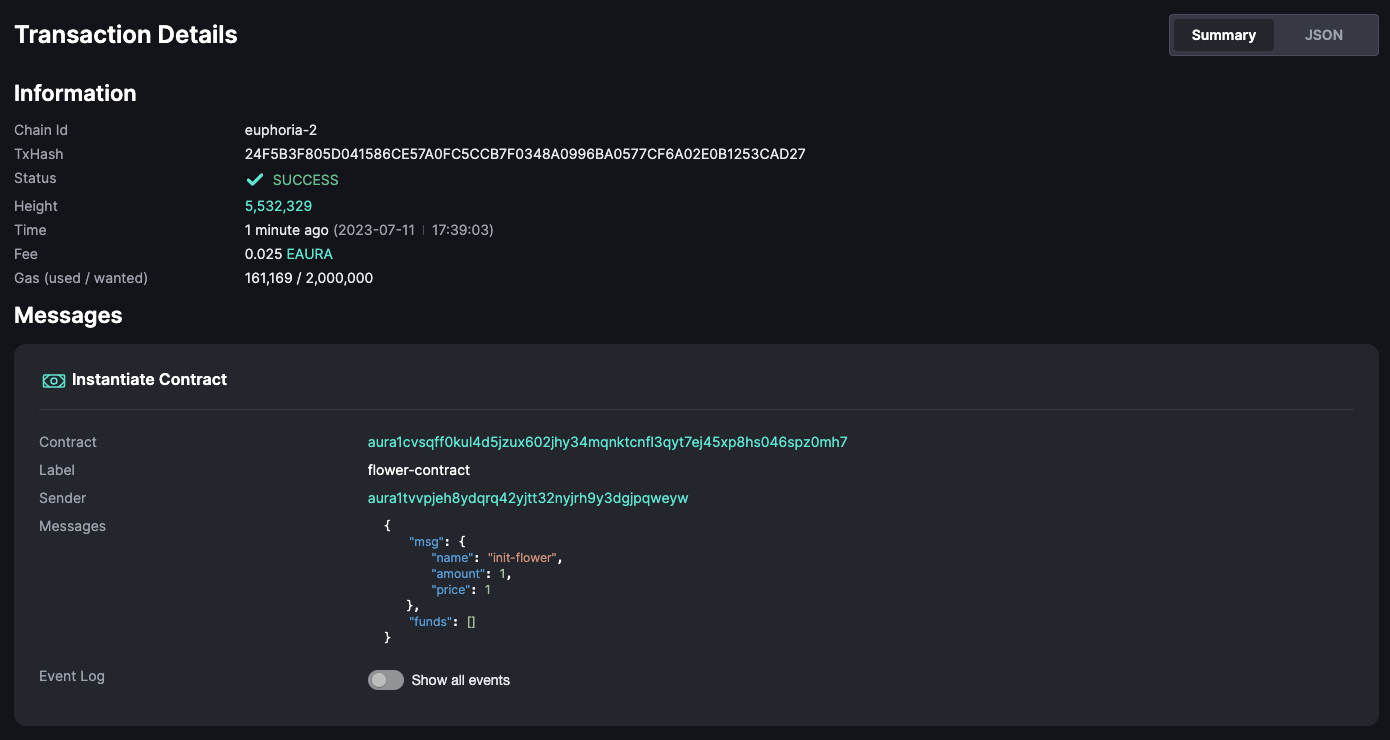
aurad tx wasm instantiate $CODE_ID $INIT --from wallet --label "flower-contract" --gas 2000000 --fees 25000ueaura --no-admin
Now our contract is stored and instantiated on the blockchain! We can now see the contract instantiated in Aurascan which should look like on the picture below.
On the last part of this section we will continue working with the same contract we just deployed. We will be interacting with it with the aurad CLI.